
How to create a virtual machine on AWS - The fast and easy way
Hello! In this article I’m going to teach you how to create a Linux virtual machine on AWS. The title says that this is the easy way, because there are means to automate this process using some other tools. But if you just want to get started right away, this article gets right to the point.
We are going to create a VM using the CentOS distro, version 7. This VM will be eligible for the AWS Free Tier, if that’s available for your account.
Requirements
- An AWS account
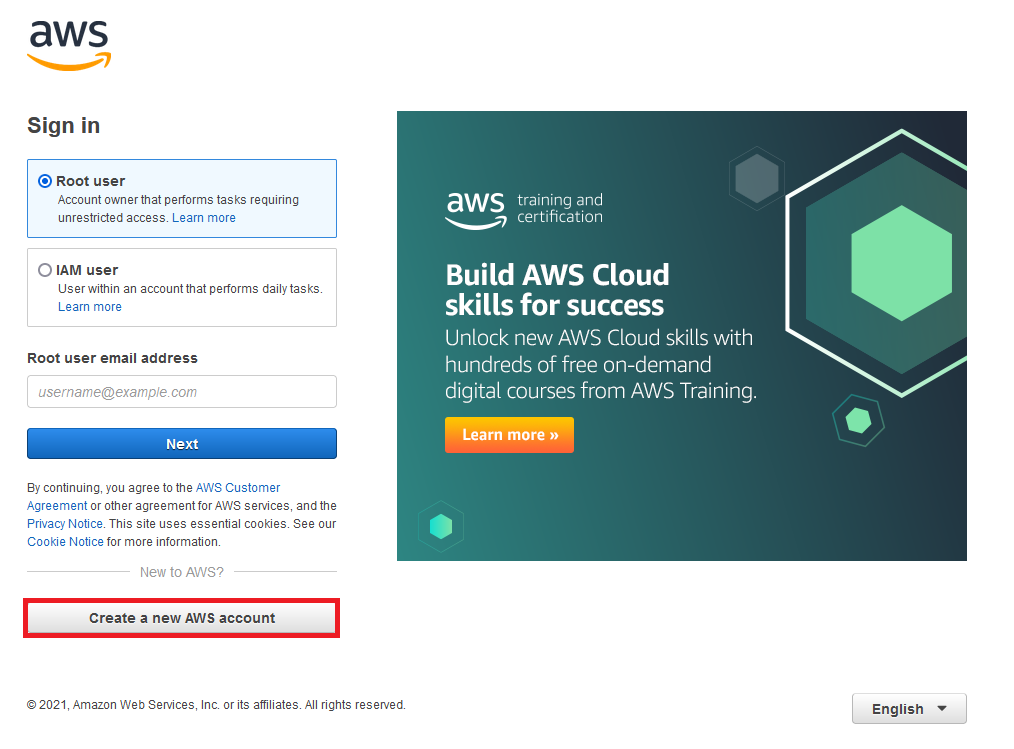
If you don’t have an account yet, you can go directly to the console page, where you will have the option to register.
Steps
1. Locating the EC2 service
When you log in, you will see several suggestions for creating solutions using AWS products. We’ll use EC2, which stands for Elastic Compute Cloud. It’s Amazon’s cloud computing service, which is both simplified and resizable, making it easy to upgrade when you need more capacity, but also easy to simply get started without being forced to overthink stuff.
You can type EC2 in the search bar and click on the first result.
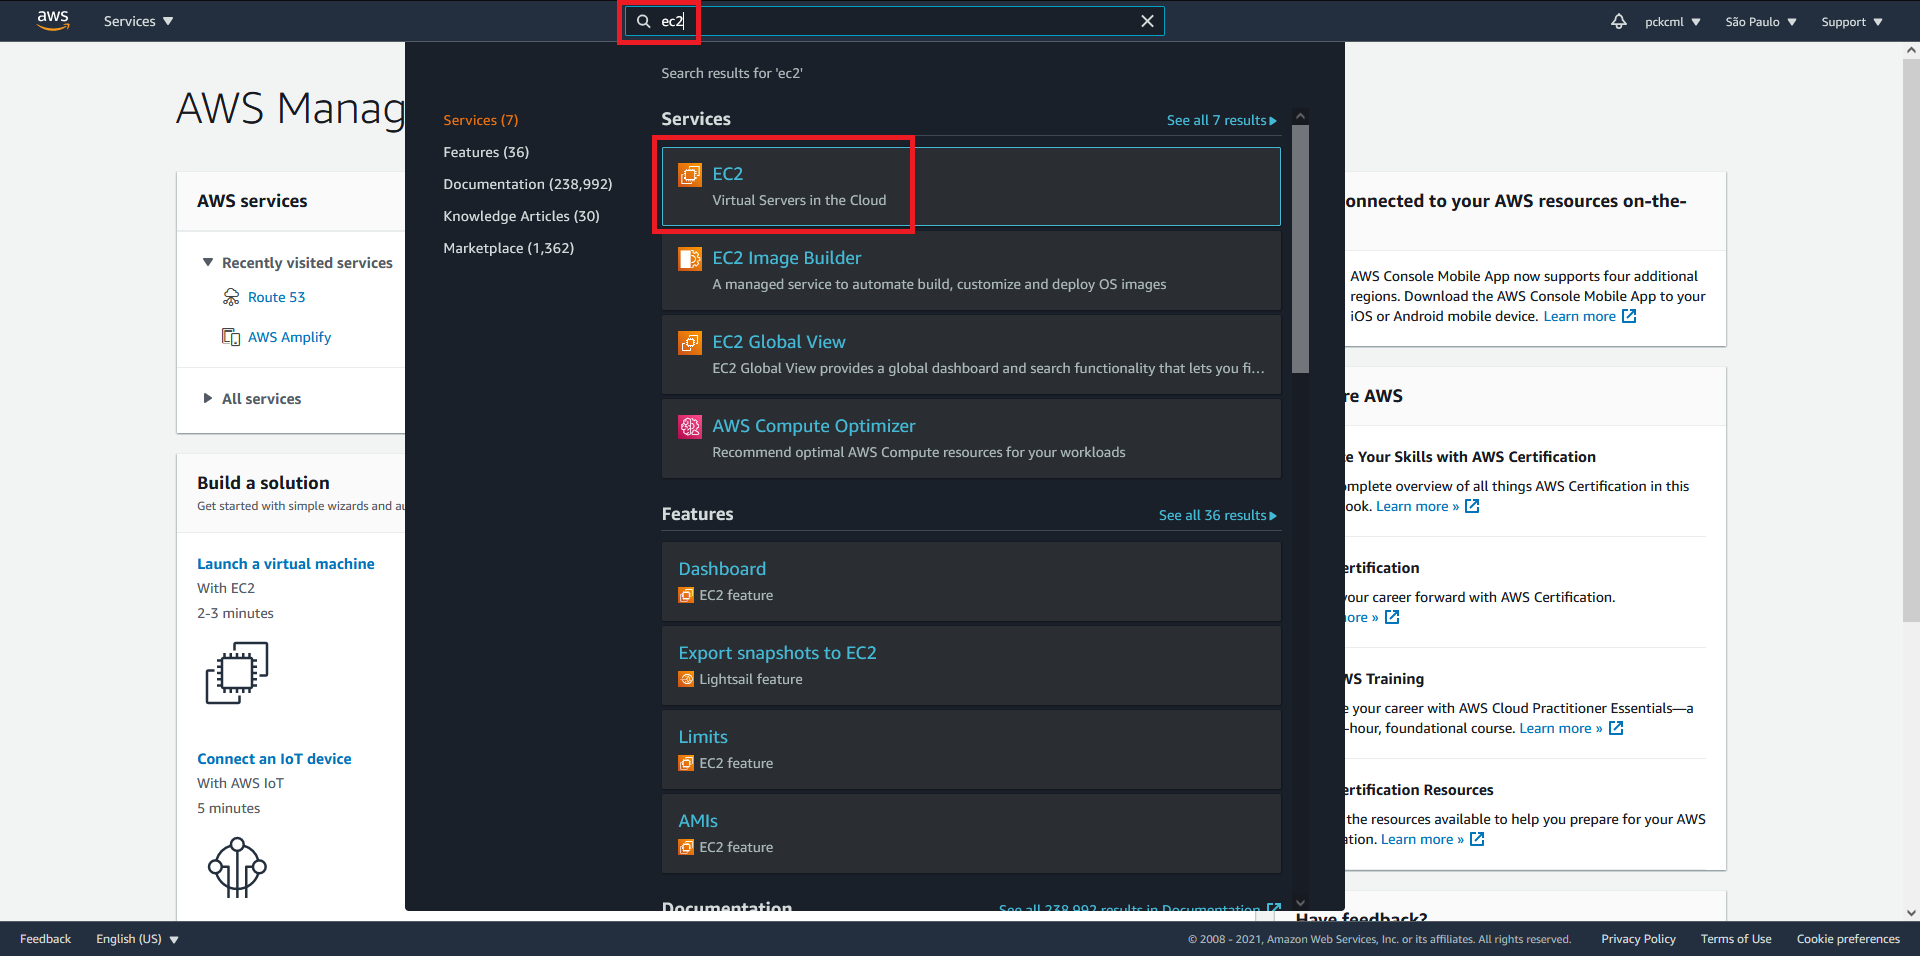
Then you’ll see the following page:
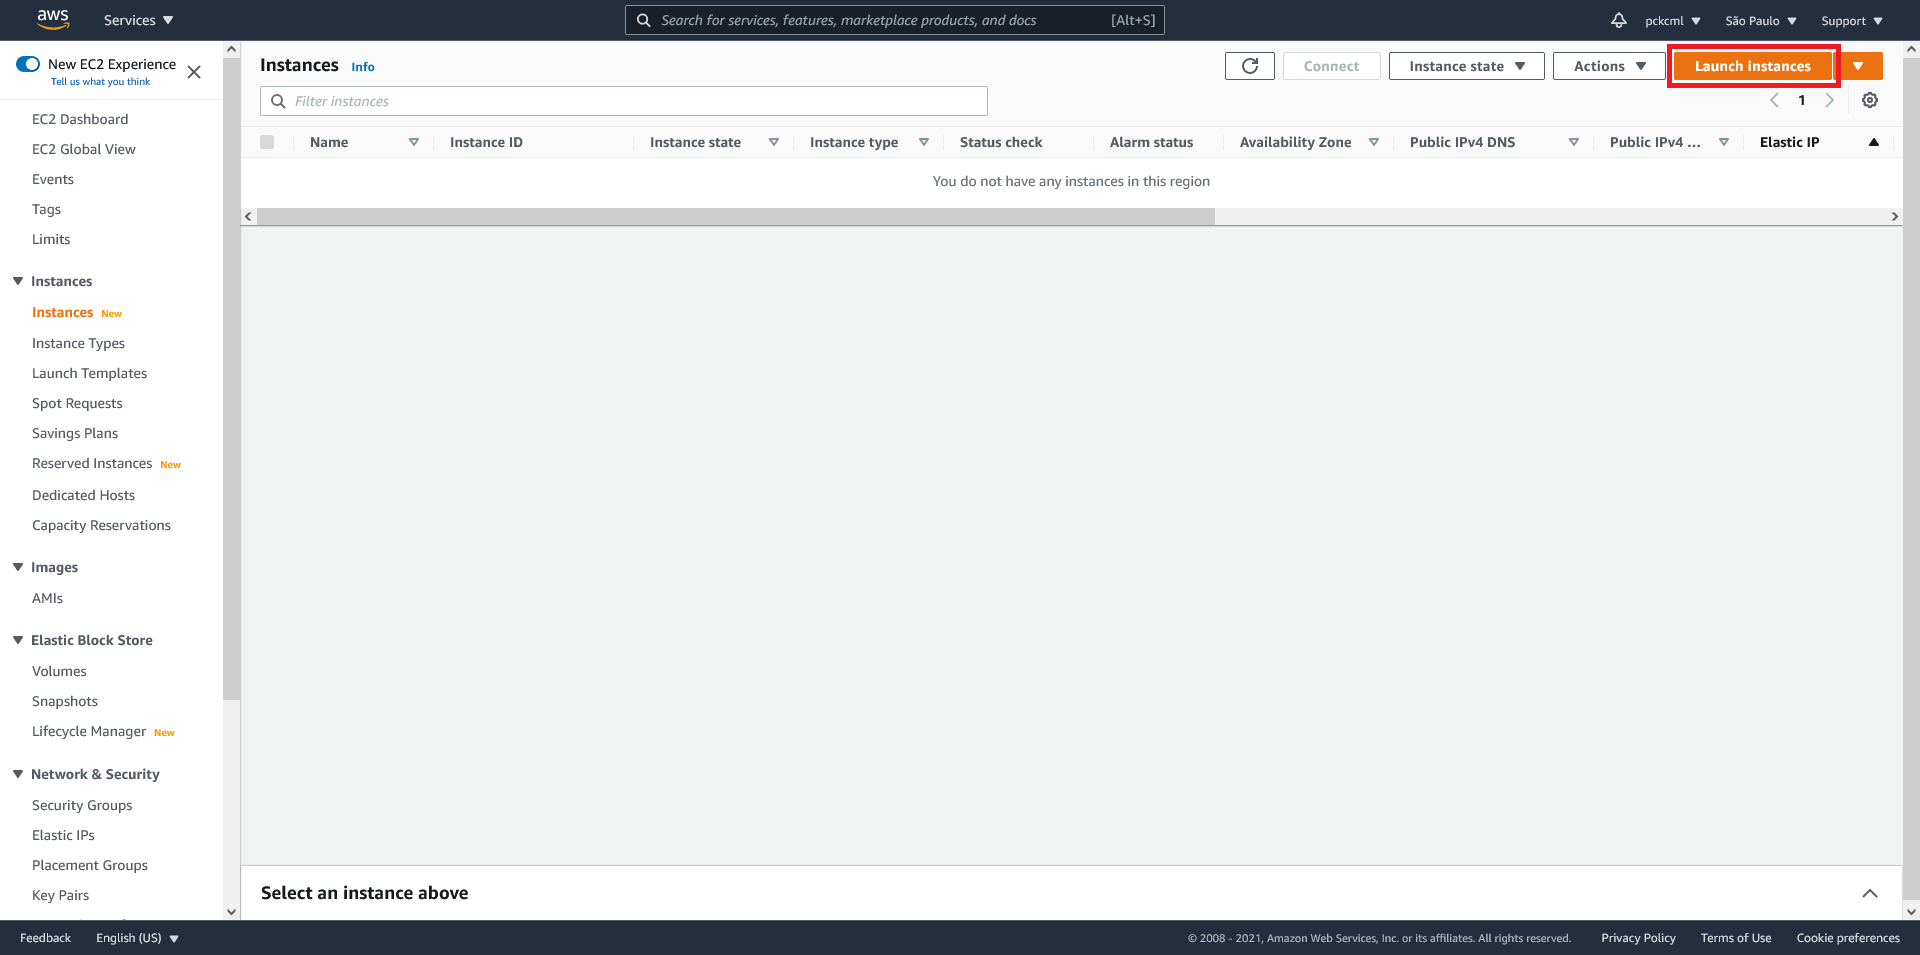
Click on Launch instances to get started.
2. Creating and launching the virtual machine
At step 1, I recommend selecting the Free tier only option in the side menu. This way, especially if you are only doing some testing, you can be sure that it will not incur unexpected costs. In this guide we are going to use the CentOS distribution, which you can type into the search bar. Then you can select the AWS Marketplace option in the side menu, like so:
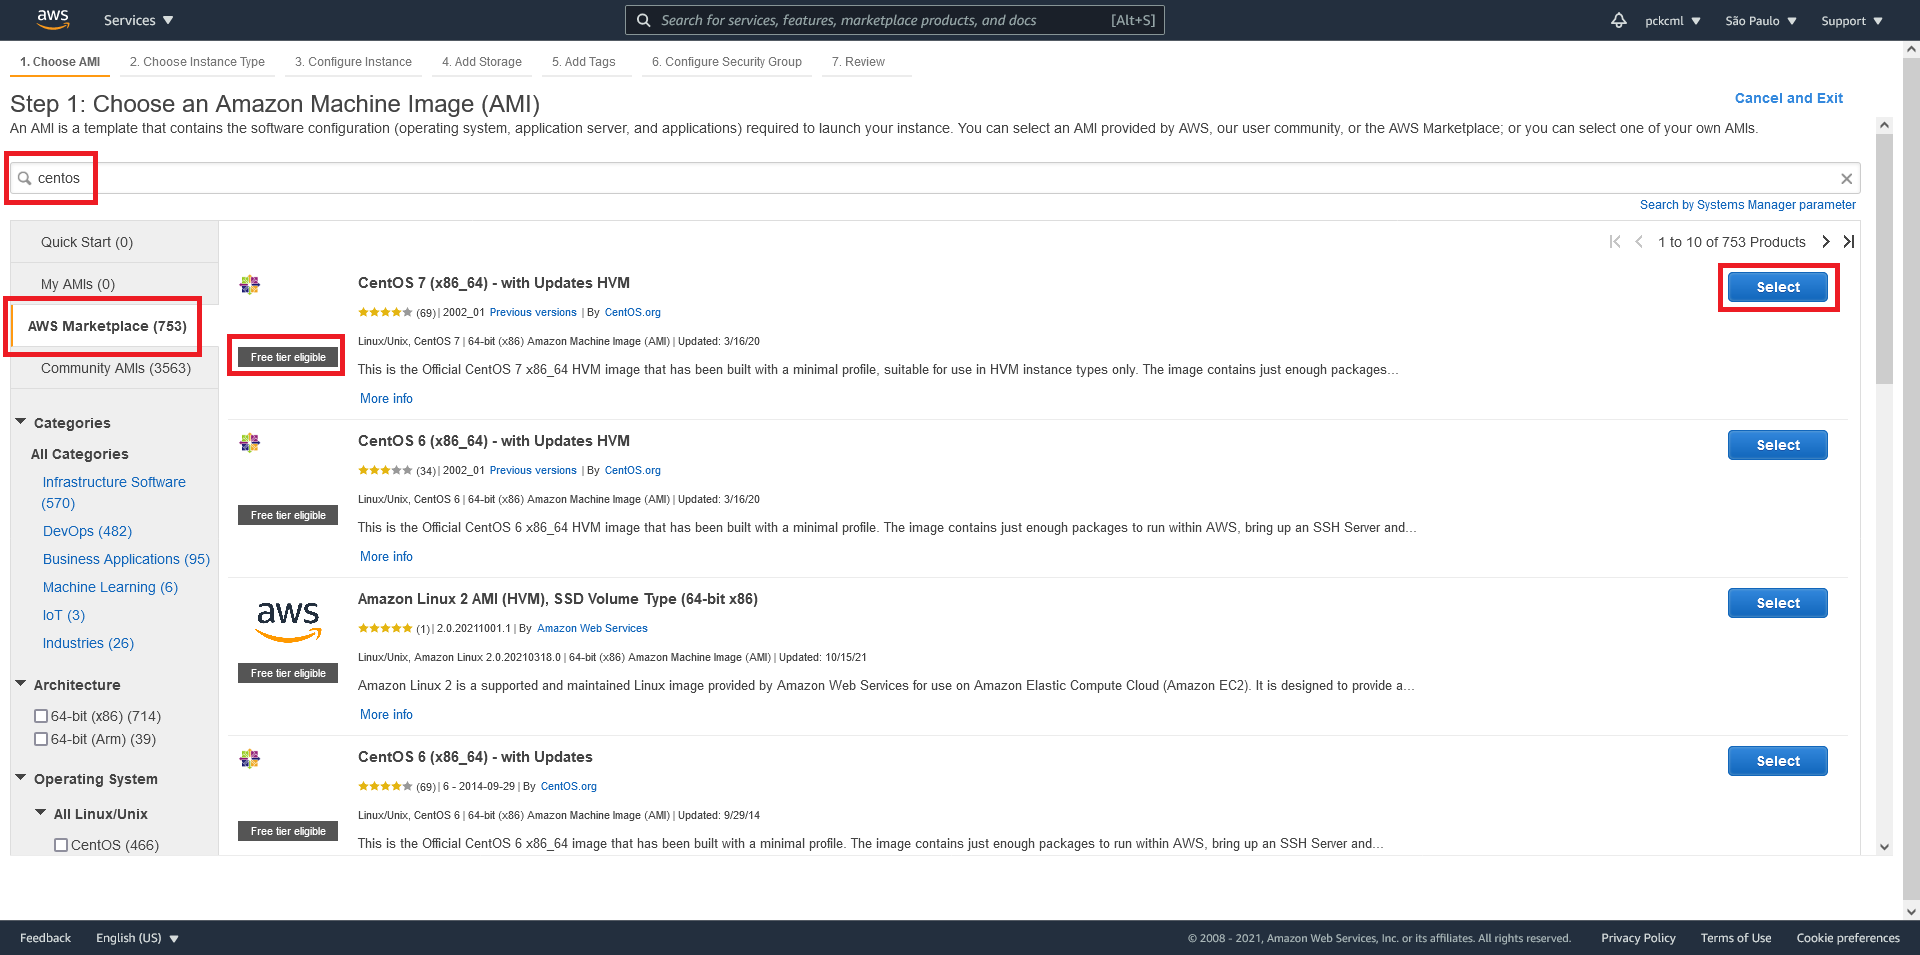
Let’s select the first option (CentOS 7 (x86_64) - with Updates HVM). Note the Free tier eligible information next to it.
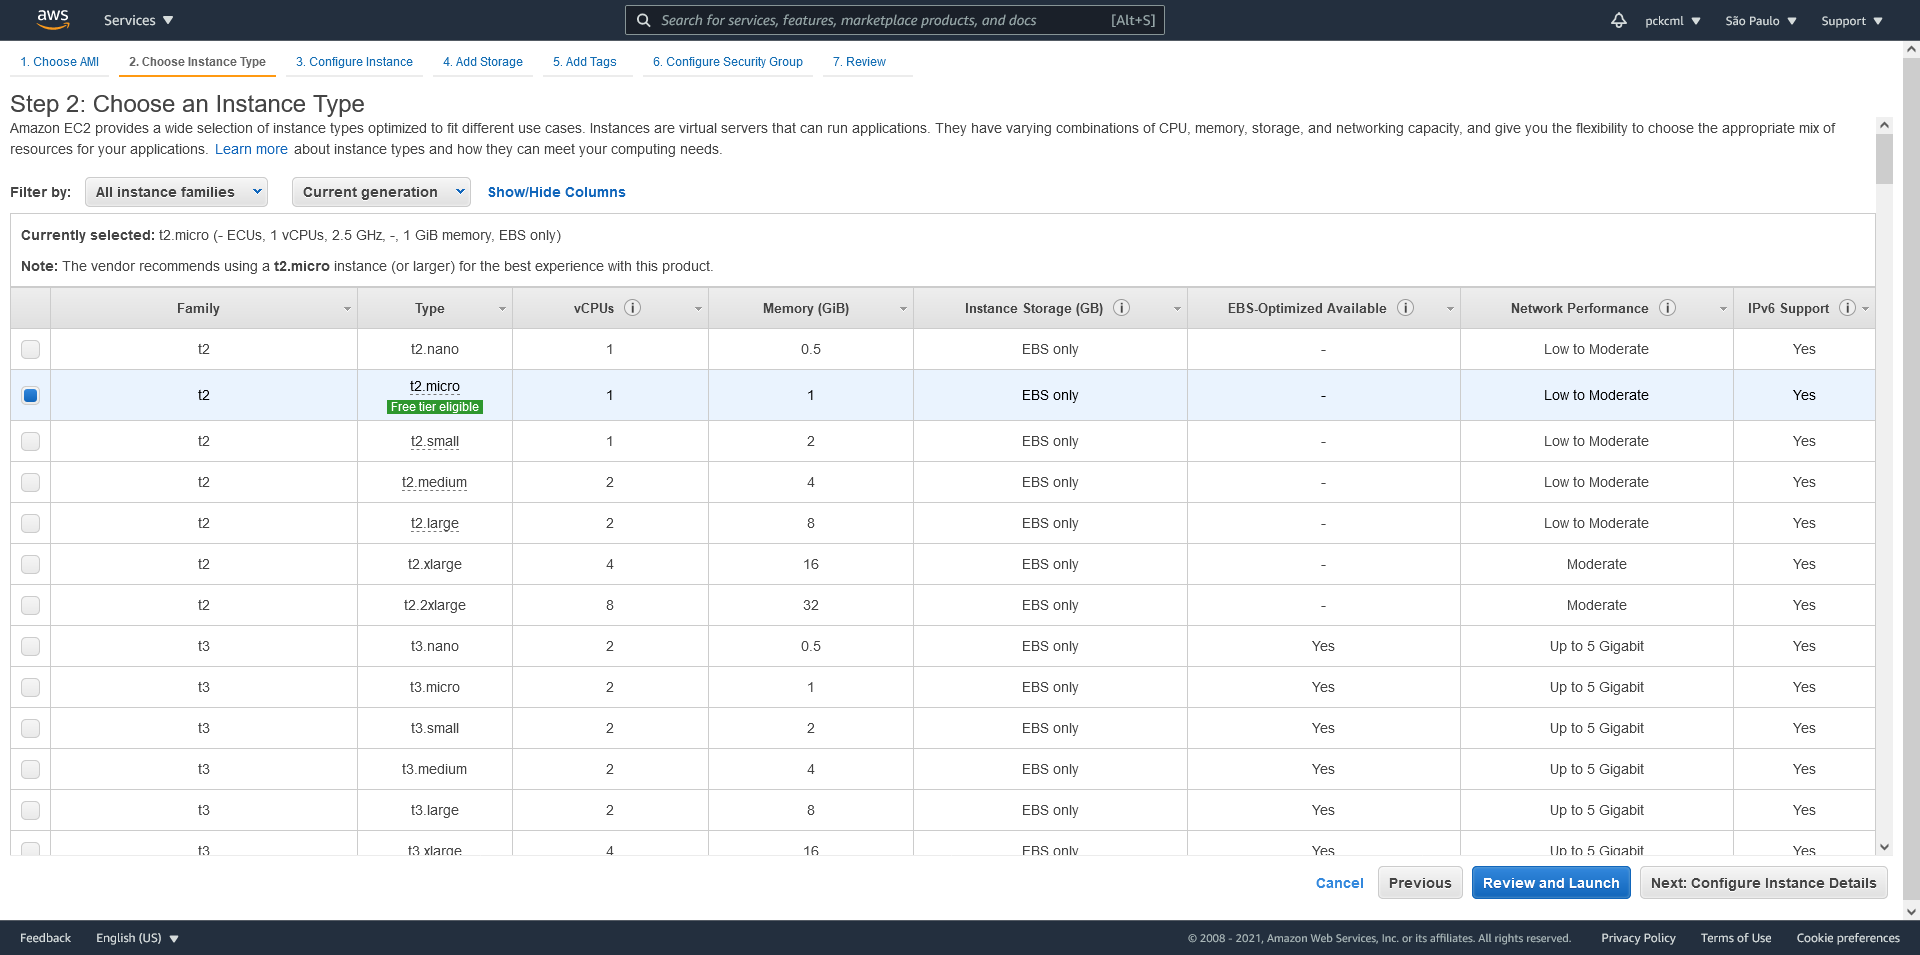
Step 2 is where you select the instance type, which determines what hardware specifications the VM will have. In this step, you will also see the free tier eligible information on the t2.micro instance, which is the one we are going to select.
Step 3 can be skipped without changing anything. You could select how many instances you want to run (we only need one, which is the default option) and other networking options. Keep in mind that the free tier offers 750 hours per month of EC2 instances running. If you run one instance all month, 24 hours a day, this quota will not be met, thus no extra costs. But if you run two instances or more, only the first will be on the free tier and the others will be billed. Be careful here.
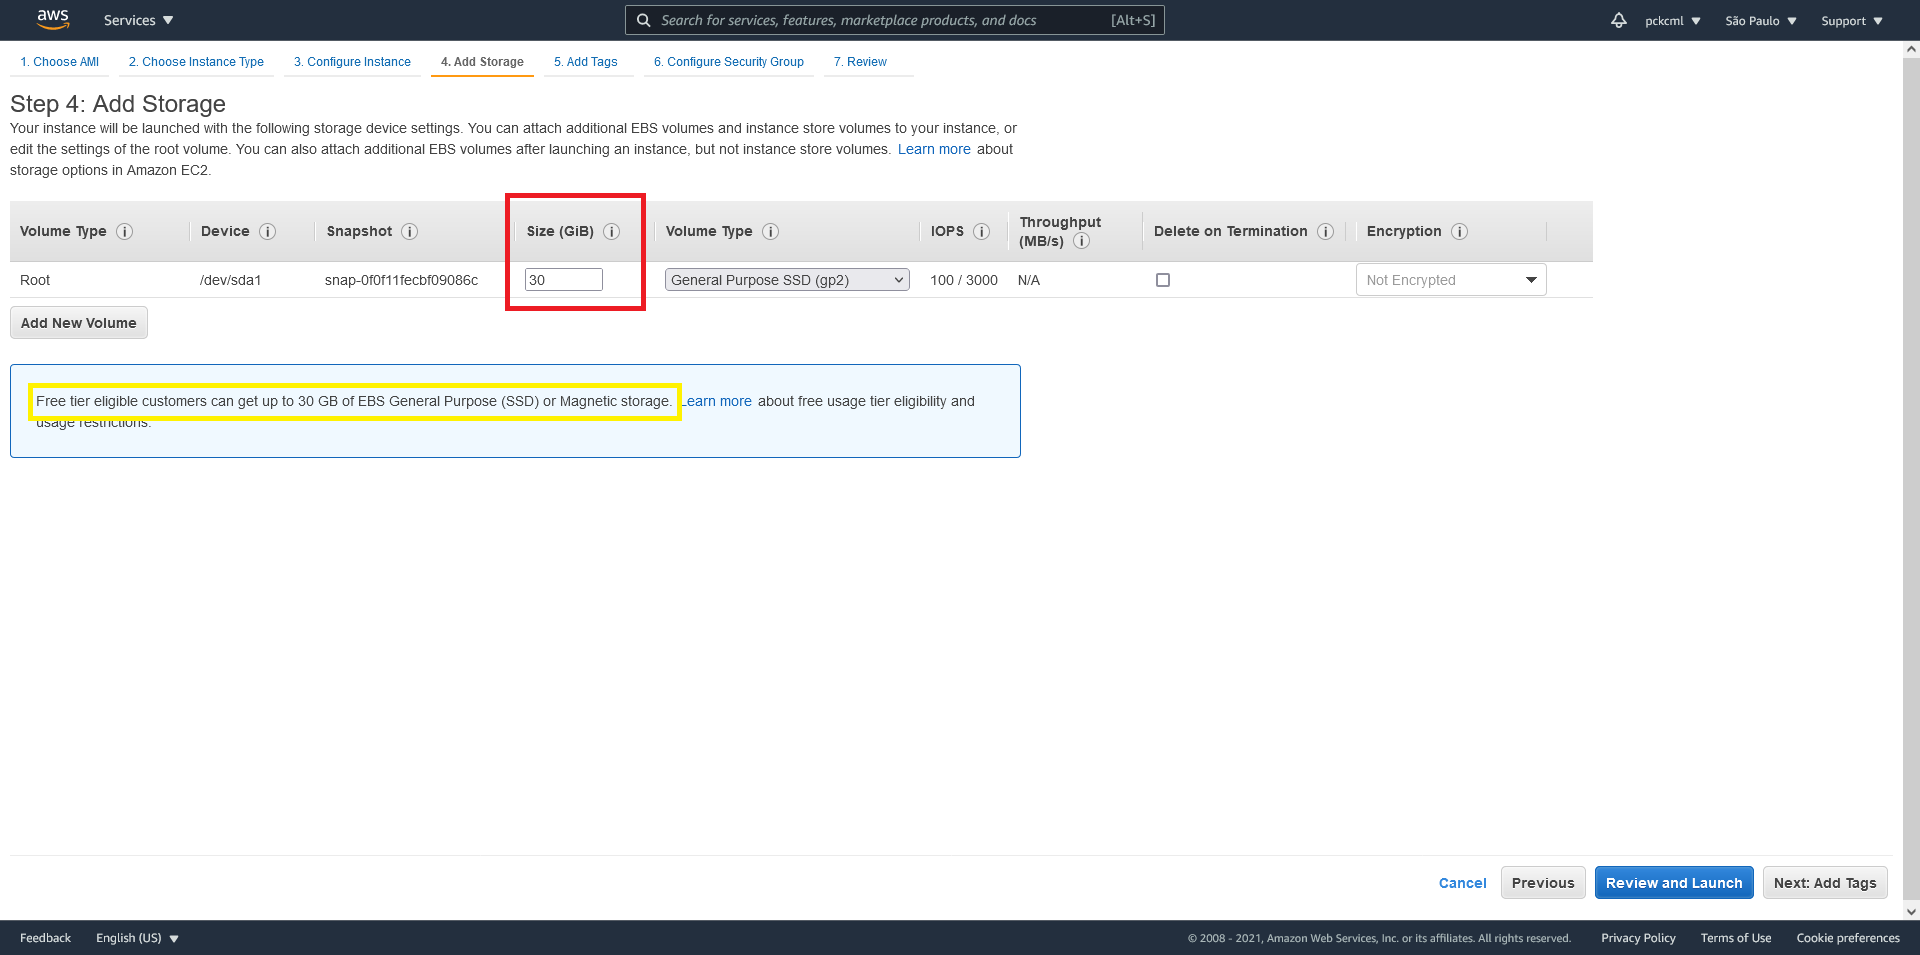
At step 4 you can configure the storage. Notice the message that says free tier eligible users can get up to 30GB SSD storage. That’s what we’re going to select, as shown in the image:
Step 5 can also be skipped without changes. In this step it’s possible to label the instance with identifiers for various purposes. Particularly we have no use for this now.
Step 6 is for setting up security and access rules for the VM. We will leave Create a new security group checked. Optionally you can click on the Add Rule button to create two new ones, as in the image below:
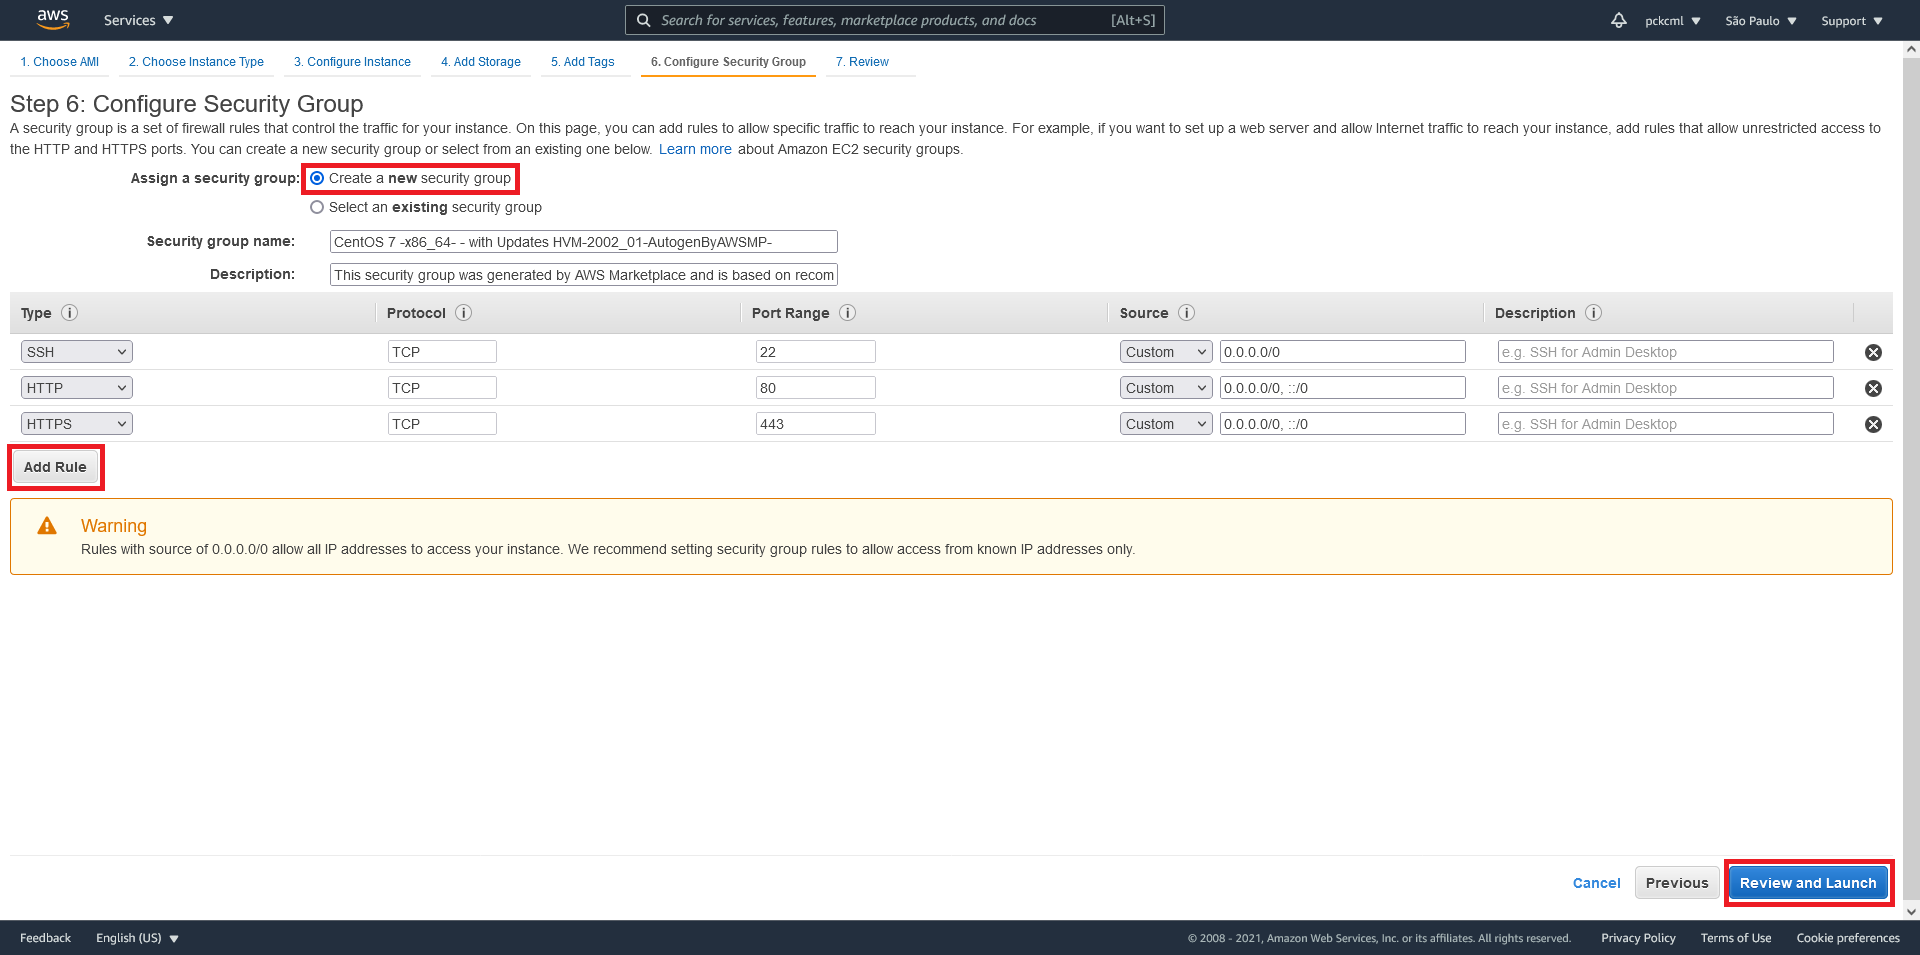
In this example, these rules created allow a web server to be accessible externally (a web server uses ports 80 and 443, like the rules created). If you already know which ports you’ll need, you can create rules accordingly. Otherwise, go ahead without doing that.
Note that the access rules indicates that anything and anyone can access these ports. The 0.0.0.0/0 permission is completely open and should be avoided in a production environment. You can fill in with your current IP to make things more secure. Click the Verify and Activate button to proceed.
At step 7 you can review all the options selected so far. Click Execute.

3. Configuring the access to the VM
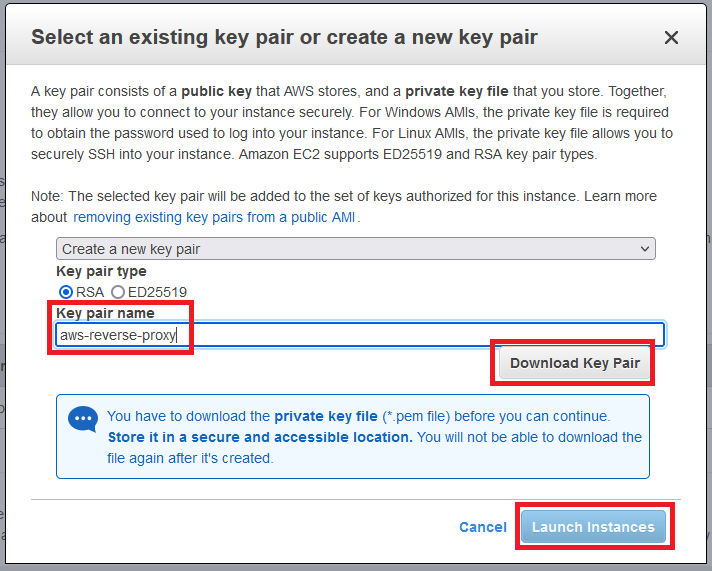
You will see a window informing you that you need to use a key pair to access the machine. I recommend selecting the create a new key pair option, choosing a name and clicking on download. Keep the downloaded file in a safe location. We’ll use it to access the VM and it is not possible to download it again in the future. Finally, click Launch instances.
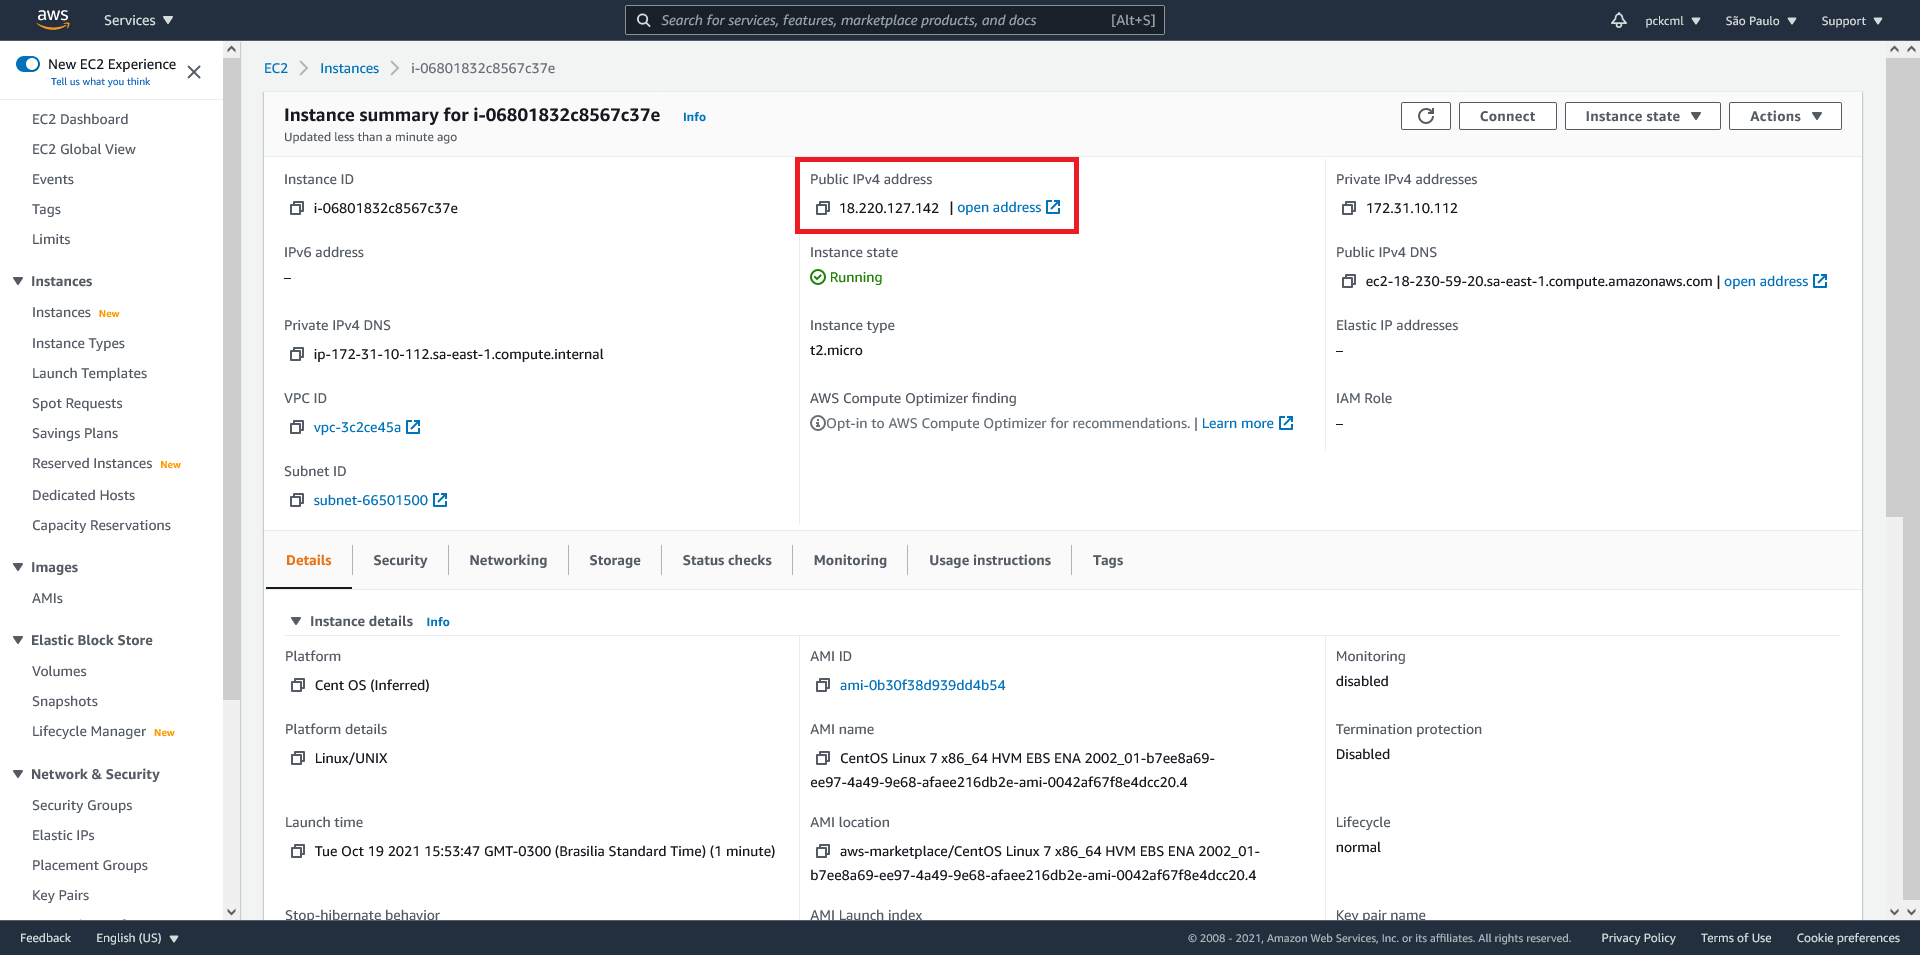
Once the instance creation is complete, we can go back to the EC2 page in the Console and see the new VM in the list. Upon clicking on it, we see the information in the image below. Take note of its IP (in the highlighted part).
Accessing the virtual machine
To use the key file downloaded in the previous step, I’m going to move it to my WSL installation on Windows. If you’re using Linux, you don’t need to do anything else. If you are using Windows and don’t have WSL, you can still use PuTTY, but you will need to set up the key file in it with a few more steps. Read this article if you need to.
I moved the .pem file to the ~/.ssh directory on WSL and changed its permissions to 600, like this:
$ cp /mnt/d/Downloads/aws-reverse-proxy.pem .ssh/
$ cd .ssh/
$ chmod 600 aws-reverse-proxy.pem
$ ls -l
total 16
-rw------- 1 patrick patrick 1704 Oct  7 11:01 aws-reverse-proxy.pem
-rw------- 1 patrick patrick 1831 Aug 24 14:57 id_rsa
-rw-r--r-- 1 patrick patrick  405 Aug 24 14:57 id_rsa.pub
-rw-r--r-- 1 patrick patrick 3548 Oct  6 10:41 known_hosts
Then we can use the following command to connect:
ssh -i ~/.ssh/aws-reverse-proxy.pem centos@<VM_IP>
Replace <VM_IP> with the IP that you noted at the end of the previous step.
Your SSH client will ask if you confirm the authenticity of the host. Answer yes and then you’ll be connected!

Checking the costs
You can always check the costs on the billing page. As long as your account is eligible to the free tier, you will see something like this on this page:
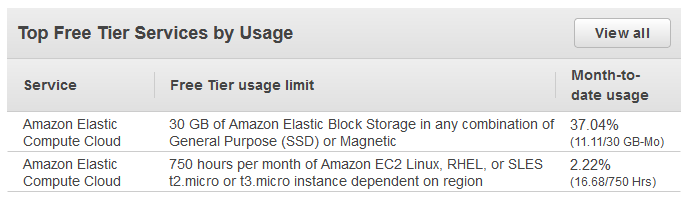
This table shows how much of the free services you are using. For the virtual machine, it shows the time quota (which is free up to 750 hours per month) and storage used (up to 30GB).
Conclusion
Thanks for reading! For a practical example of how you can use a virtual machine on AWS, you can read my article about using NGINX as a reverse proxy. You can also check the ‘aws’ tag on my website.